
[ad_1]
Learn how to remove an Apple ID from your iPhone easily with this step-by-step guide.
There are many reasons you might wish to remove an Apple ID from an iPhone without performing a full factory reset. You may have changed your Apple ID or created a new Apple account, or you may simply wish to unlink your Apple account and corresponding information from an iPhone without needing to factory reset the device — this might occur when selling or decommissioning the smartphone.
When performing a full reset by tapping Settings, you can select General and tapping Transfer or Reset iPhone and selecting Erase All Content And Settings. This process removes most of an Apple ID’s settings from the iPhone but typically still requires the Apple ID password if Find My [device] is enabled and hasn’t been deactivated on the handset. Problems can occur with Activation Lock, which helps secure your iPhone by preventing an unauthorized user from reactivating the device without your permission, if you don’t first sign your Apple ID out of an iPhone when choosing to Erase All Content And Settings.
Note: Apple recommends manually logging out of your Apple account before performing the Erase All Content And Settings step before giving away, trading in or selling an iPhone. So even if you’re fully erasing and resetting an iPhone, it’s helpful to know and understand the following process of removing an Apple ID from an iPhone.
Disassociating your Apple ID from an iPhone
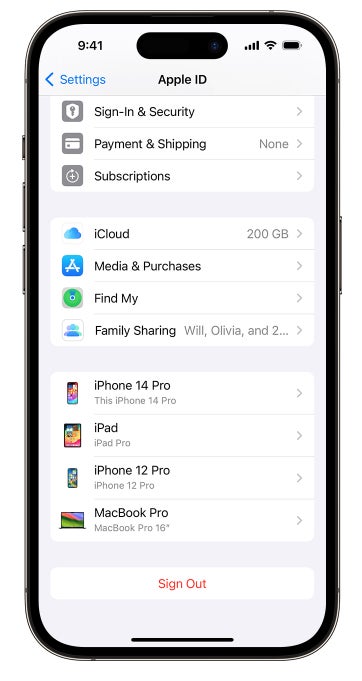
To remove or disassociate your Apple account ID from an iPhone, the steps are straightforward. First, tap Settings and select your Apple ID name. Scroll to the bottom of the screen and tap the red Sign Out button (Figure A).
Figure A
The iPhone will prompt you to enter your Apple ID password to confirm the action. Type your password and then press Done.
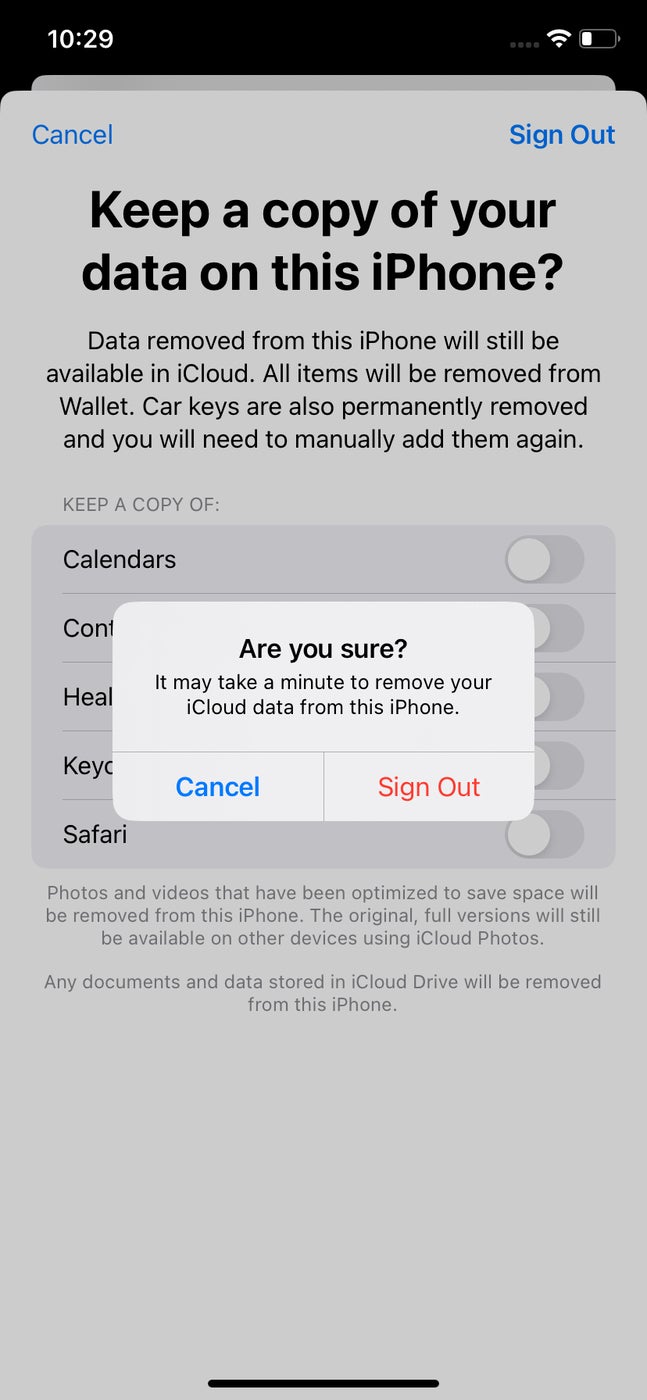
Next, the iPhone will ask whether you wish to keep a copy of different items, including Calendars, Contacts, Health and Keychain information. Move the respective slider button to enable saving the corresponding data on the local iPhone once the Apple account is no longer associated with the device, if you want to retain that information. Photos and videos that were optimized to save space will be removed from the iPhone, although the full-size versions will remain available within your iCloud account.
The next step is to tap Sign Out and then tap Sign Out again (Figure B) when the iPhone asks again if you’re sure you wish to remove iCloud data from the phone to complete the process. After confirming the action, the iPhone will display a screen saying it is copying iCloud data. The process can take several minutes.
Figure B
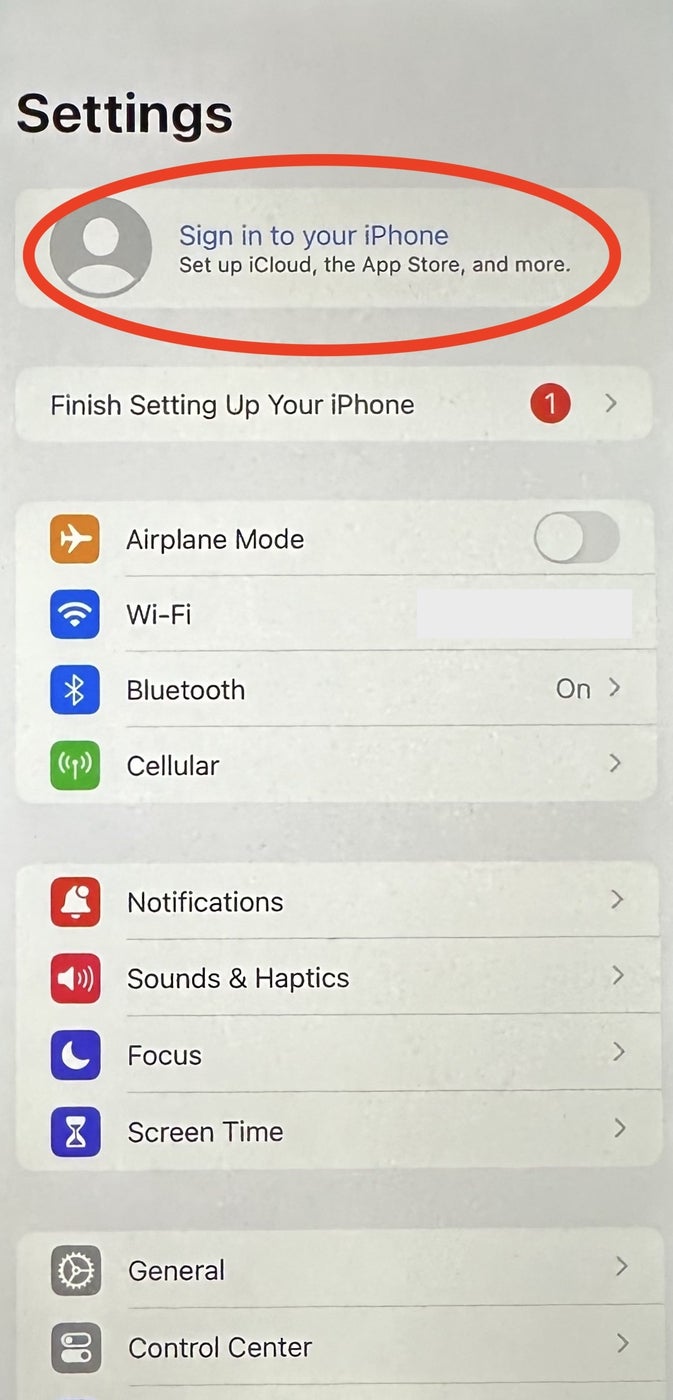
When the process completes, you’ll see the Settings menu no longer lists an Apple ID; instead, the screen will display a message asking you to Sign In To Your iPhone in the same location where your Apple ID information normally appears at the top of the Settings screen (Figure C).
Figure C
Apple will send a confirmation message to the email address associated with your Apple ID noting the Find My service has been disabled, assuming the feature was enabled. The same message warns the Apple ID and password are no longer needed to activate and use that iPhone. Now you can move forward knowing the Apple ID is removed from the iPhone, and your account is no longer associated with that smartphone.
[ad_2]
Source Credit