[ad_1]
When roles change at work, you have at least four ways to transition Google Site ownership and content.
When you create a Google Site, the system recognizes you as the owner of that site. The site owner may manage not only the site’s content and settings, but also control all access to the site.
But sometimes you may need to transfer the ownership of a Google Site from one person’s Google account to another. For example, when an employee leaves an organization, you’ll want to transfer site ownership to a current employee. Organizational acquisitions or spin-outs may also spur a need to transfer Google Sites.
The following steps detail four options available to transfer ownership and content of a Google Site from one account to another. Since there are no Google Sites mobile apps, you’ll want to follow the steps below in any modern web browser, such as Chrome, on a computer.
Jump to:
Transfer a Google Site to another Google account
The simplest way to transfer ownership of a Google Site is to transition responsibility via the Share menu.
- Go to Google Sites.
- If needed, sign in with your Google account. Make sure to use the account that is the owner of the site.
- Click or tap on the site to open it.
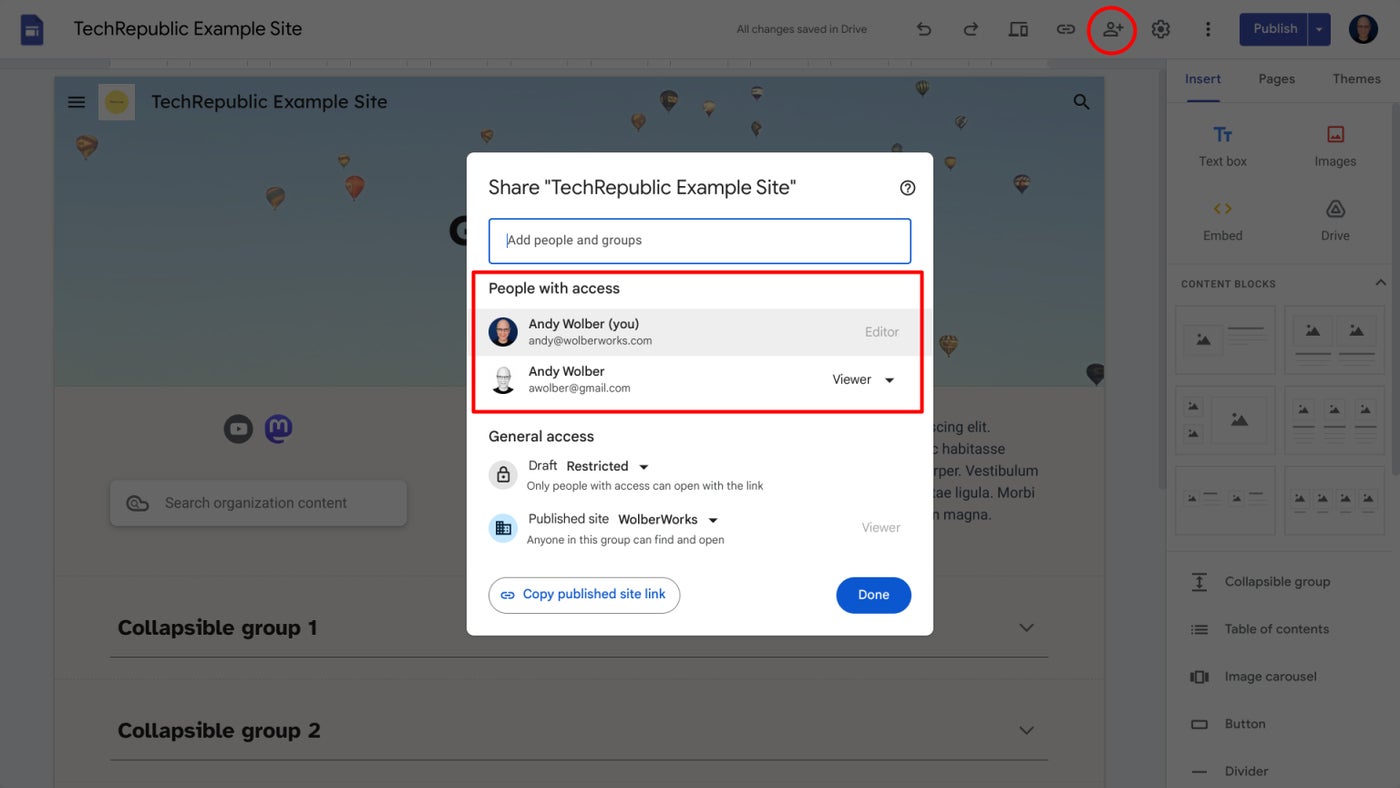
- Select the Share icon (Figure A, upper right). This displays the list of people with access.
Figure A
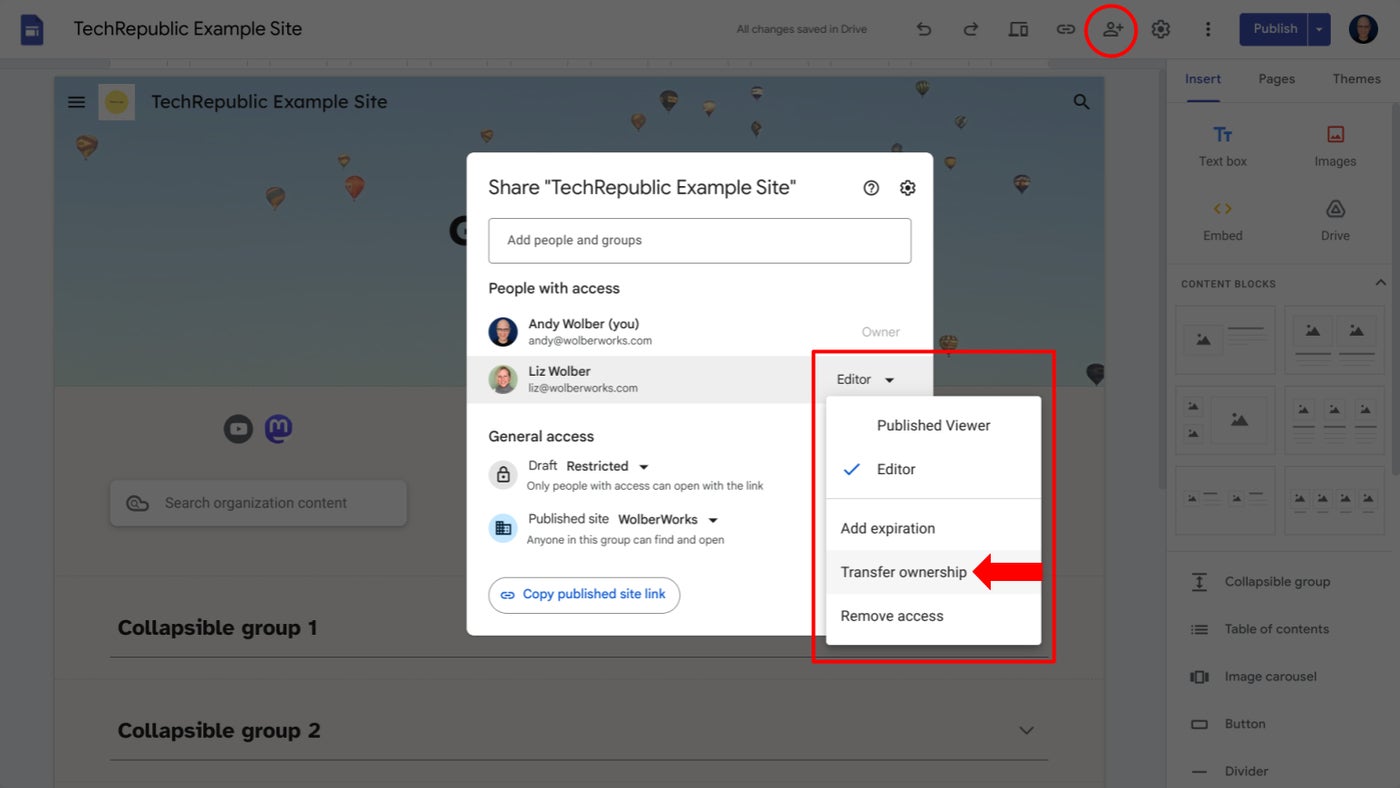
- Select the share option menu to the right of the transferee, then choose Transfer Ownership (Figure A, middle).
- A “Make this person the owner?” message will display (Figure B).
Figure B
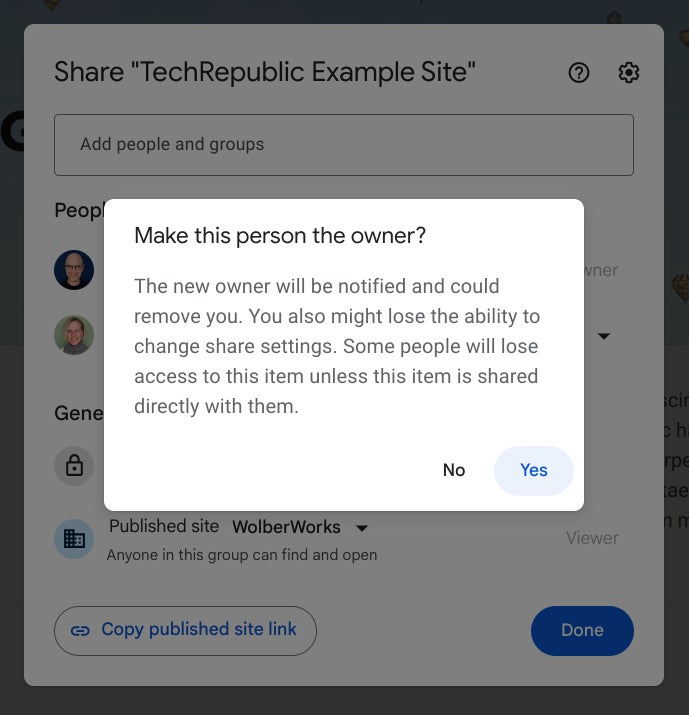
- Select Yes to confirm the transfer of ownership. The person will typically receive an email indicating they now have ownership of the selected site.
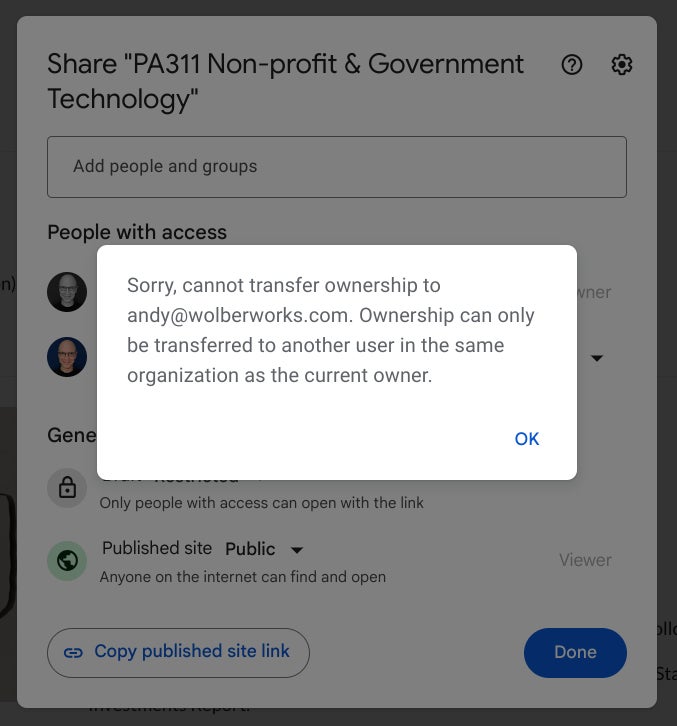
Google Sites doesn’t allow you to transfer a site from an organizational account to an outside account; if you attempt to do so, the system will prevent the transfer (Figure C). If you encounter this message, an alternative may be to make a copy of a site, as covered below.
Figure C
Transfer a Google Site to others via a shared drive
For people with Google Workspace accounts that support shared drives, another option is to transfer a site to a shared drive. When you do this, the shared drive becomes the “owner” of the site. Each member of the site automatically gains access to the site, with an access level that corresponds to their access level to the shared drive. In other words, a member who has Viewer access to the shared drive will have Viewer access to the Google Site.
Here’s how to find your Google Site file on Google Drive and then move it to a shared drive.
- Go to Google Drive.
- In the search box, first narrow the file type with:
type:site
- Following this, add a space and then enter the name of your site. For example, in Figure D, the entry shown is:
type:site TechRepublic Example
This should display your Google Site file in the results.
Figure D
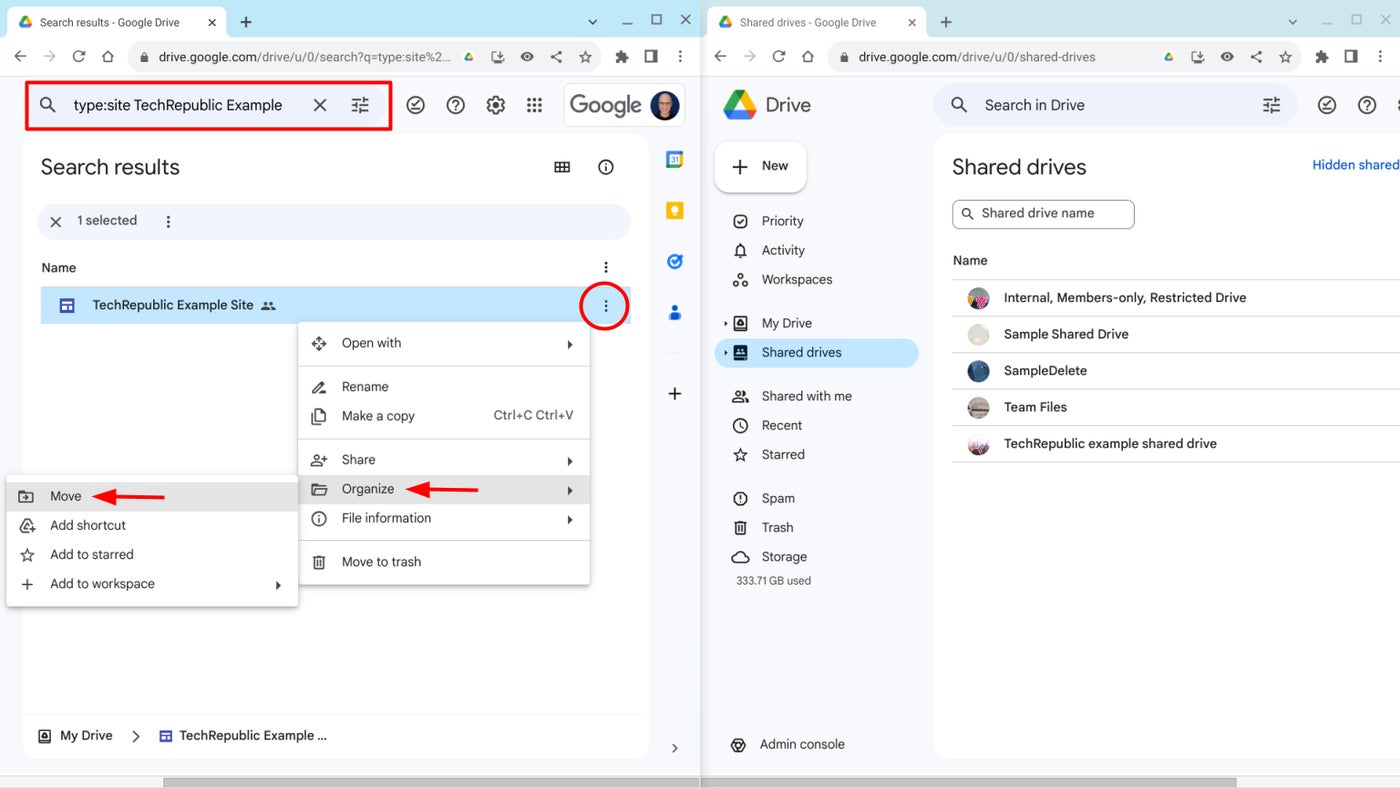
- To the right of your file, select the More menu (Figure D, circled).
- From the menu options, choose Organize, then Move (Figure D, arrows).
- Next, navigate to your desired destination shared drive, such as the ones shown in the right half of Figure D.
- Give the system a few moments to complete the move and configure permissions.
- Optional: To confirm that the shared drive is now the owner of the file, access the site Share list. A Google Site on a shared drive will not list any account as the owner (Figure E), for example.
Figure E
Make a copy of a Google Site to duplicate the content
Since you may not transfer ownership of a Google Site outside an organization, your best option may be to make a copy of a site. This duplicates the content of a site in a separate file, with the owner of that new, copied file being whoever made the copy. This method allows you to move a site’s contents between, for example, two different Google Workspace organizational accounts or from a Workspace organizational account to a personal Google account.
- Go to Google Sites.
- If needed, sign in with your Google account. Make sure to use a Google account that has access to the site and is the destination account — the one in which you wish to have the copy of the site.
- Click or tap on the site to open it.
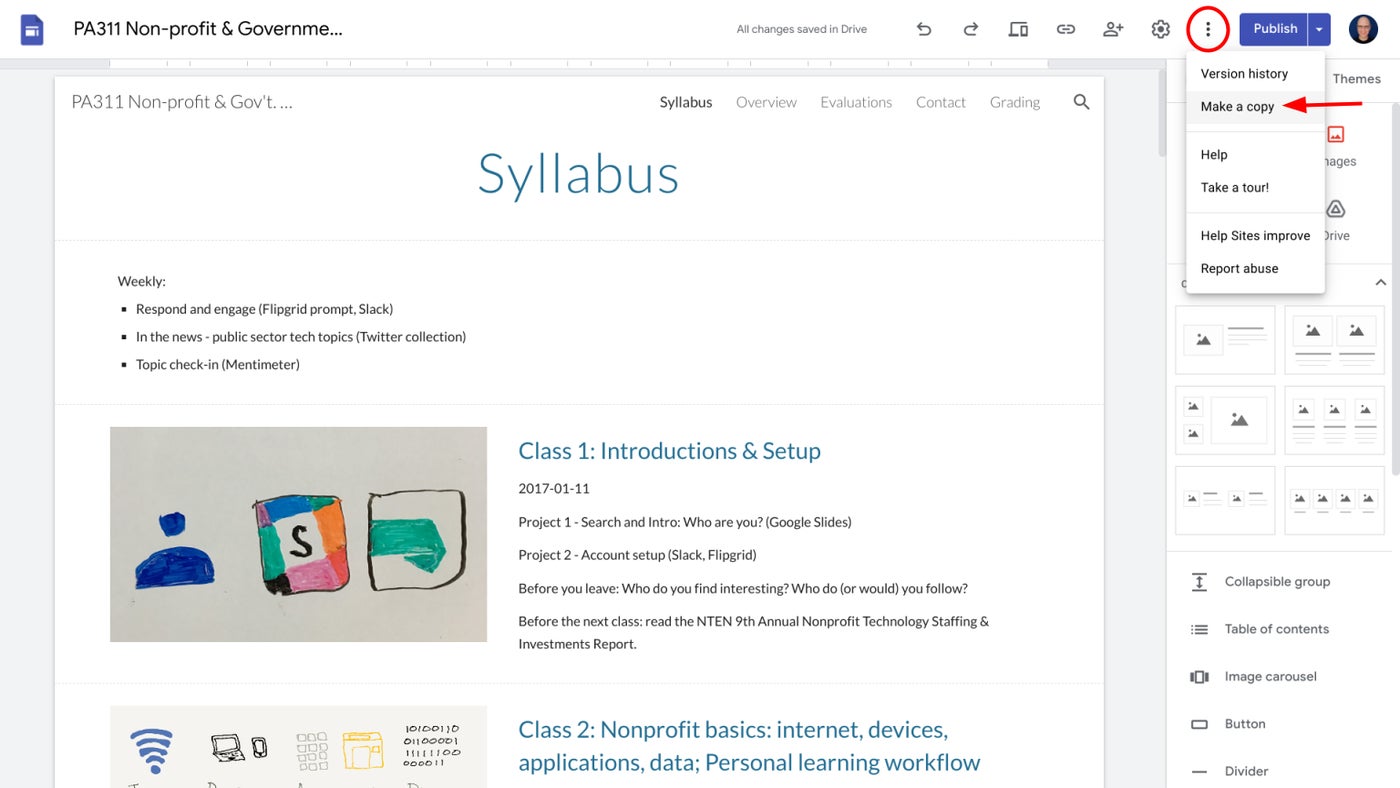
- Select the More menu (Figure F, circled).
- Choose Make A Copy (Figure F, arrow).
Figure F
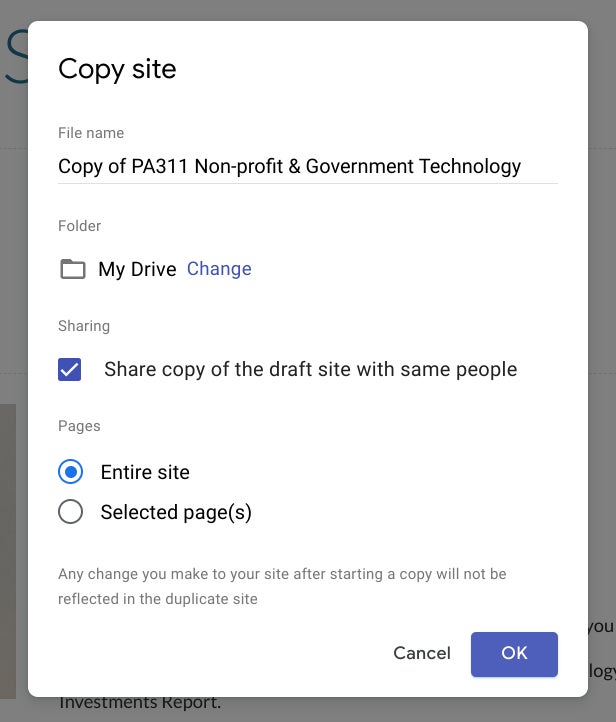
- Review and adjust any copy site options as desired. For example, when you want to ensure that all current collaborators gain access to the copied site, check the box to Share Copy Of The Draft Site With The Same People (Figure G).
- Select OK to copy the site.
Figure G
The copied site will have a different URL than the original site. In some cases, you may want to modify domain name registration settings to point to the new URL.
Save and re-add content to manually rebuild a Google Site
In rare circumstances where none of the above options are feasible, you might resort to manual replication of Google Site content. To do this, you would need to save images and text from a site, then manually add that content to a newly created Google Site. You might do this by selecting and saving text to individual files, right-clicking on images individually and saving them, or even by printing each page to a PDF for reference. For a site with a few pages and images, this process could be quite quick; however, for large sites with a significant amount of content, the workload could be considerable. Most people will want to use any of the above transfer methods before resorting to this approach.
Mention or message me on Mastodon (@awolber) to let me know which of the above methods you typically use to transfer Google Site ownership. In an organizational setting, such as at work or school, what formal procedures do you have in place to ensure these transitions occur smoothly when needed?
[ad_2]
Source Credit