[ad_1]
After years of struggling with Microsoft Excel’s internal conversion feature, users can now disable Excel’s internal data conversion feature.
Excel tries to determine an input value’s data type — and, for most of us, that’s helpful. For instance, if you enter a string that represents a date, Excel automatically converts it into the date value. If you meant to enter the date, great; if not, you’re out of luck. Once entered, that entry is a date, and there’s no way to get the original string value back.
By default, there are four such Excel conversion behaviors; in 2021, Microsoft rolled out toggle options, allowing users to choose how to implement three of them but not the string conversion. Good news: Windows and Mac versions now include an option that lets you disable the string conversion behavior in Excel. Below is more detail about this Excel problem and the solution, which is specific to Microsoft 365.
Jump to:
Excel’s conversion feature often makes mistakes
This Excel issue has been a nuisance to many users, particularly the scientific community. In fact, we’re told that geneticists even changed the short notation for genes rather than continue to work around the Excel string conversion behavior.
Let’s consider an example: March1 is the short name for the Membrane Associated Ring-CH-Type Finger 1 gene, and it looks like the date March 1. When you enter March1, Excel converts it to a date automatically. This is because — in an effort to be helpful — Excel assumes the value is actually the date.
You might try pressing Ctrl + Z to undo the conversion, but it won’t work. Instead, Excel removes the automatically applied date format, leaving the date’s serial value. At this point, you can’t even convert the entry to text because the value is now a number. The original string, MARCH1 and its meaning are gone.
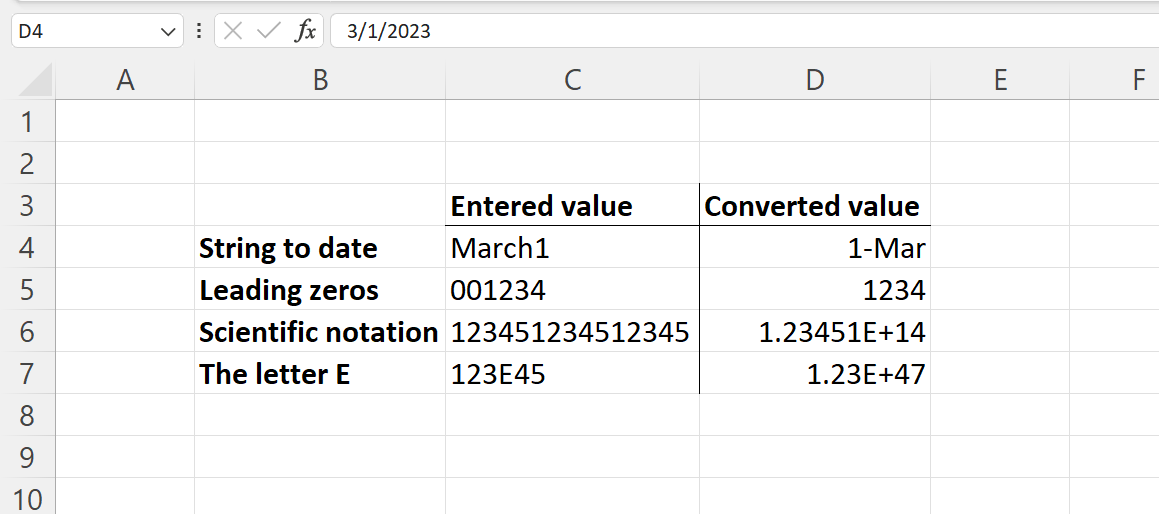
Excel’s conversion feature converts four types of input values:
- Excel converts text entries that Excel can interpret as dates to date values.
- Excel removes leading zeros and converts the value to a number.
- Excel truncates a numerical value of 15 digits or more to scientific notation.
- Excel converts numerical digits surrounding the letter E to a scientific notation.
Figure A shows an example of each type of input values. You can see the values entered and the values Excel converted them to. For some users, this is a nightmare because it forces them to format cells before entering data; if they forget, there’s no workaround, and they must start over.
Figure A
As mentioned earlier, there’s no easy fix for undoing Excel’s automatic conversion for strings it converts to date. You must format the target cell as Text before entering data. The same is true with values that include leading zeros and values that include the letter E. The only conversion that users can easily fix after the fact is the conversion of large numerical values to scientific notation. You can change the format for these values to a Number format to remove the scientific notation.
New Excel options allow you to disable the conversion feature
A few years ago, Excel finally implemented three toggle options that allow users to disable three of the four internal conversion behaviors; unfortunately, these options didn’t help with the string conversion behavior. Only after learning about the geneticists’ workaround did Microsoft finally add a fourth option that allows users to disable internal string conversion. You don’t have to be a geneticist to appreciate this final option; in fact, the internal string conversion problem frustrated more users than any of the other three conversion behaviors.
That final fix began rolling out this summer, and everyone should have it by now. Finally, you can control how Excel handles strings that could also represent dates.
To find these options in Microsoft 365, follow these steps:
- Click the File tab.
- Choose Options or choose More and then Options.
- Click Data in the left pane. (Originally, the settings were in the Advanced section; the Data section makes better sense and should be easier to find.)
- In the Automatic Data Conversion section, you’ll see several options (Figure B).
Figure B
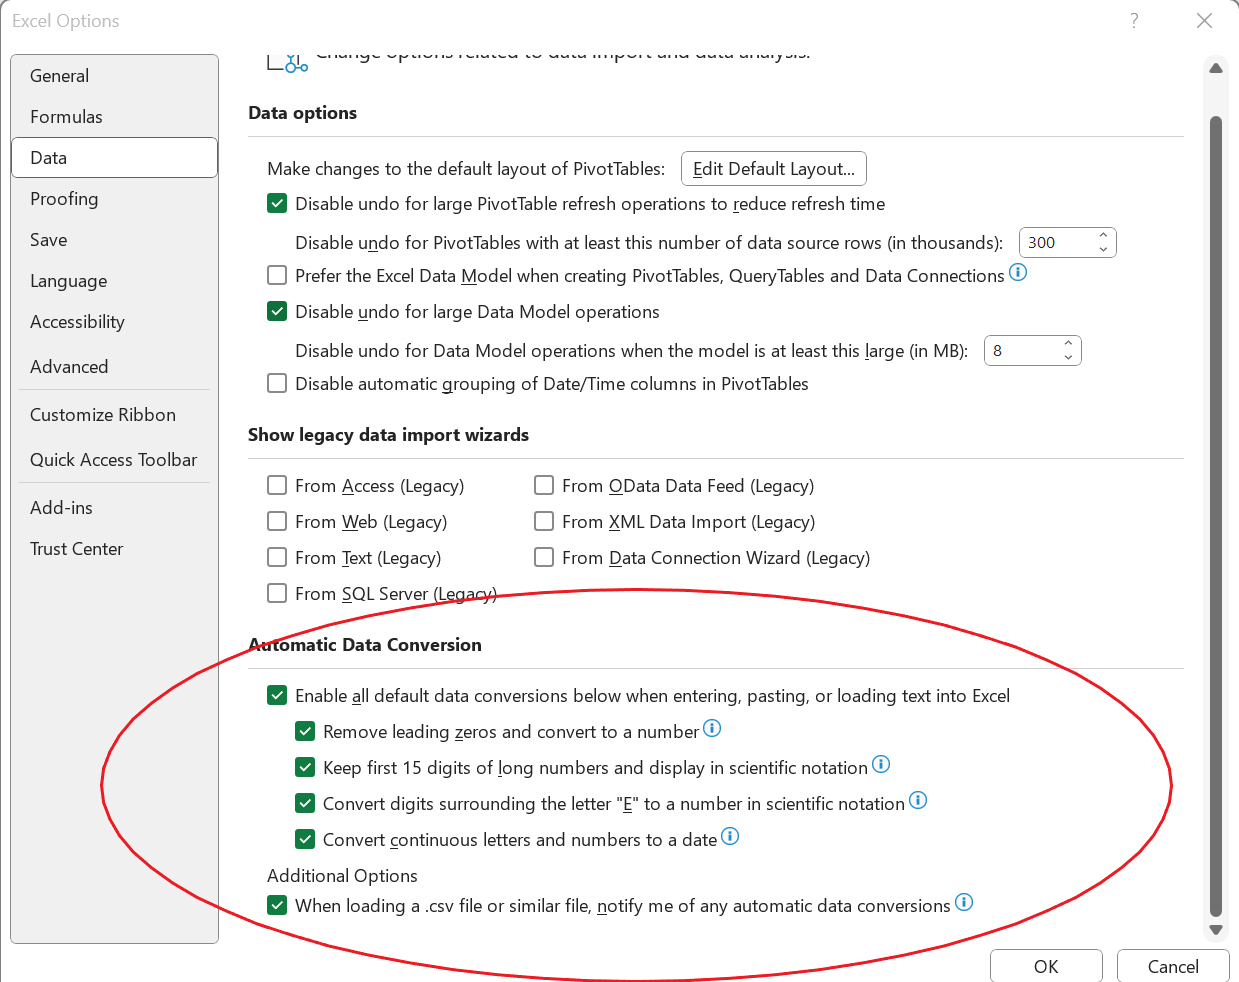
You can now disable all the internal conversion behaviors. To disable all of the behaviors, you can uncheck the first option: Enable All Default Data Conversions Below When Entering, Pasting, Or Loading Text Into Excel. Or, you can leave that option checked and uncheck one or more of the other options, as needed.
The last option, When Loading A .CSV File Or Similar File, Notify Me Of Any Automatic Number Conversions, is handy when you’re importing data that Excel might convert automatically. It’s a simple option that alerts you before converting the incoming data. At that point, you can choose to import without converting the data.
You can leave the default behavior as is, which is the same as it’s always been. Or you can change the default behavior by using one or more of the four new options. However, this is an application-level behavior, so once you set it for one workbook, Excel applies it to all workbooks. Perhaps in the future, we’ll see this control extended to individual workbooks. In addition, there’s no way to disable these conversion options using a macro.
[ad_2]
Source Credit