[ad_1]
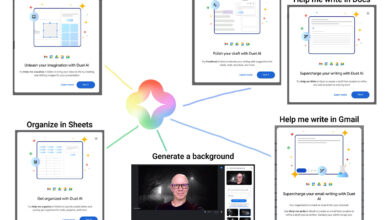
Google Slides now lets you record a presentation with inset video from your webcam. Each recording may be a maximum of 30 minutes long. No longer do you need to turn to a third-party tool or web meeting app, such as Google Meet, to record a presentation. Instead, you can start and finish the task with nothing more than Google Slides on a laptop.
As of March 2024, slide recordings may be made by customers who use Google Workspace Business Standard or Plus; Enterprise Starter, Essentials, Essentials Plus, Standard or Plus; and Education Plus editions.
How to make a basic slide recording in Google Slides
To create a slide recording, you’ll need to use Google Chrome on a computer that has a camera and microphone.
- Go to Google Slides and open your presentation.
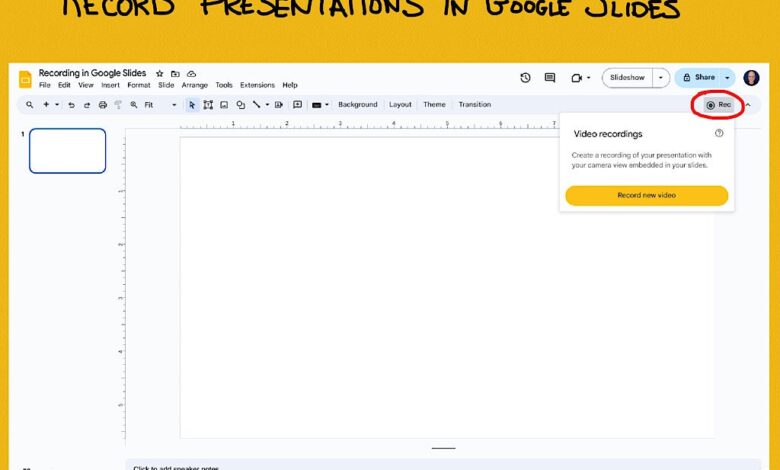
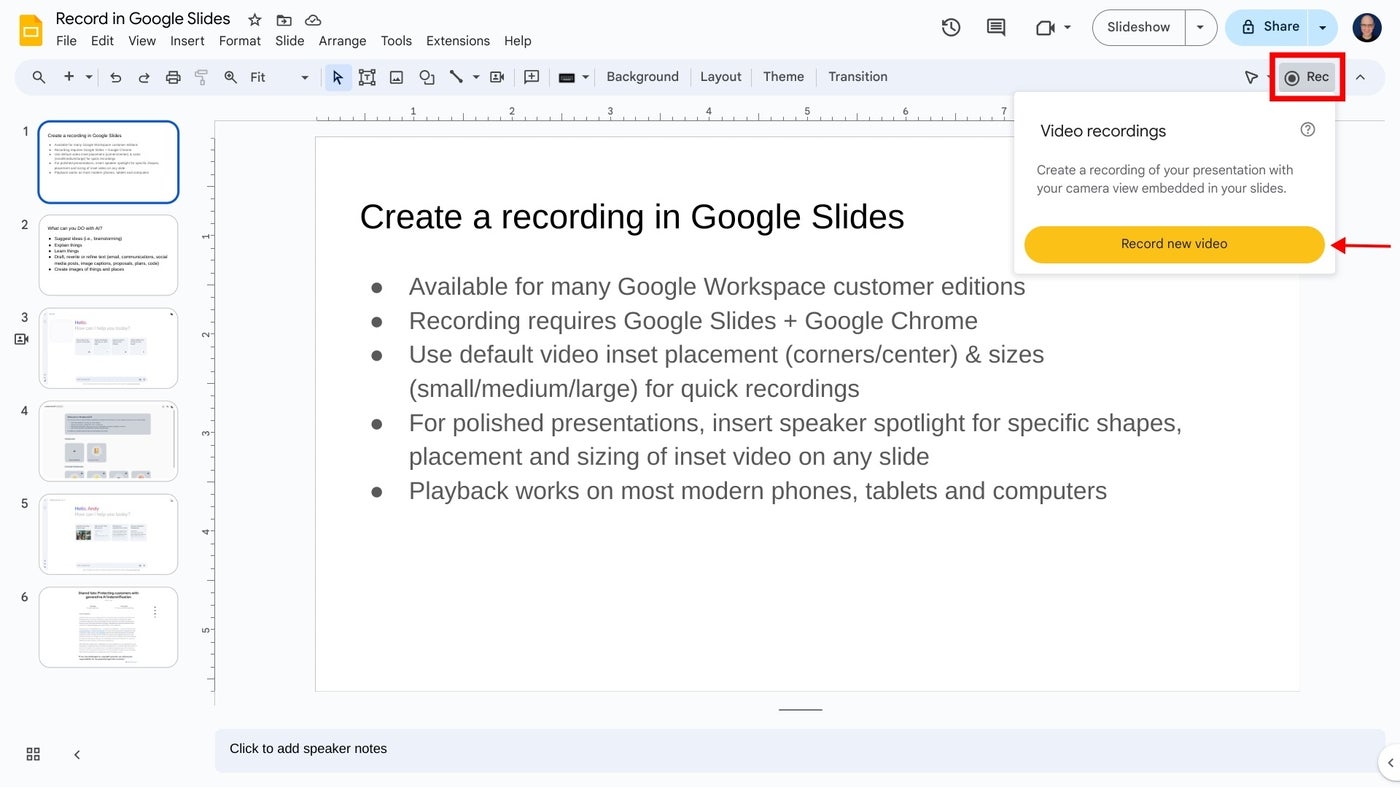
- Select the Rec button in the upper right area, then select the Record new video button (Figure A).
The system will switch to the screen recording interface, with recording controls displayed below your slides. By default, the system will display your inset (picture-in-picture) video in medium size in the lower right corner of a slide, since this portion of a slide is often empty.
- Optionally, before you start recording, you might adjust three settings:
-
-
- Modify the location of the inset (picture-in-picture) video frame (Figure B). Select the inset location icon, found to the immediate right of the forward slide (>) icon, to move the location to be any of the corners or center area of a slide.

Figure B: Adjust the default video inset location (lower right) and size (medium) using the controls shown in the red box, or activate speaker notes with the icon indicated by the arrow. Image: Andy Wolber/TechRepublic - Modify the size of the inset video frame. Select the size icon, found to the right of the video inset location icon, then choose either a small, medium or large video frame size.
- Open speaker notes with the button found to the immediate left of the back slide (<) icon. This will display speaker notes for your reference while recording. (Ideally, you would not need to refer to speaker notes, so that you could instead look directly at the camera as you record.)
- Modify the location of the inset (picture-in-picture) video frame (Figure B). Select the inset location icon, found to the immediate right of the forward slide (>) icon, to move the location to be any of the corners or center area of a slide.
-
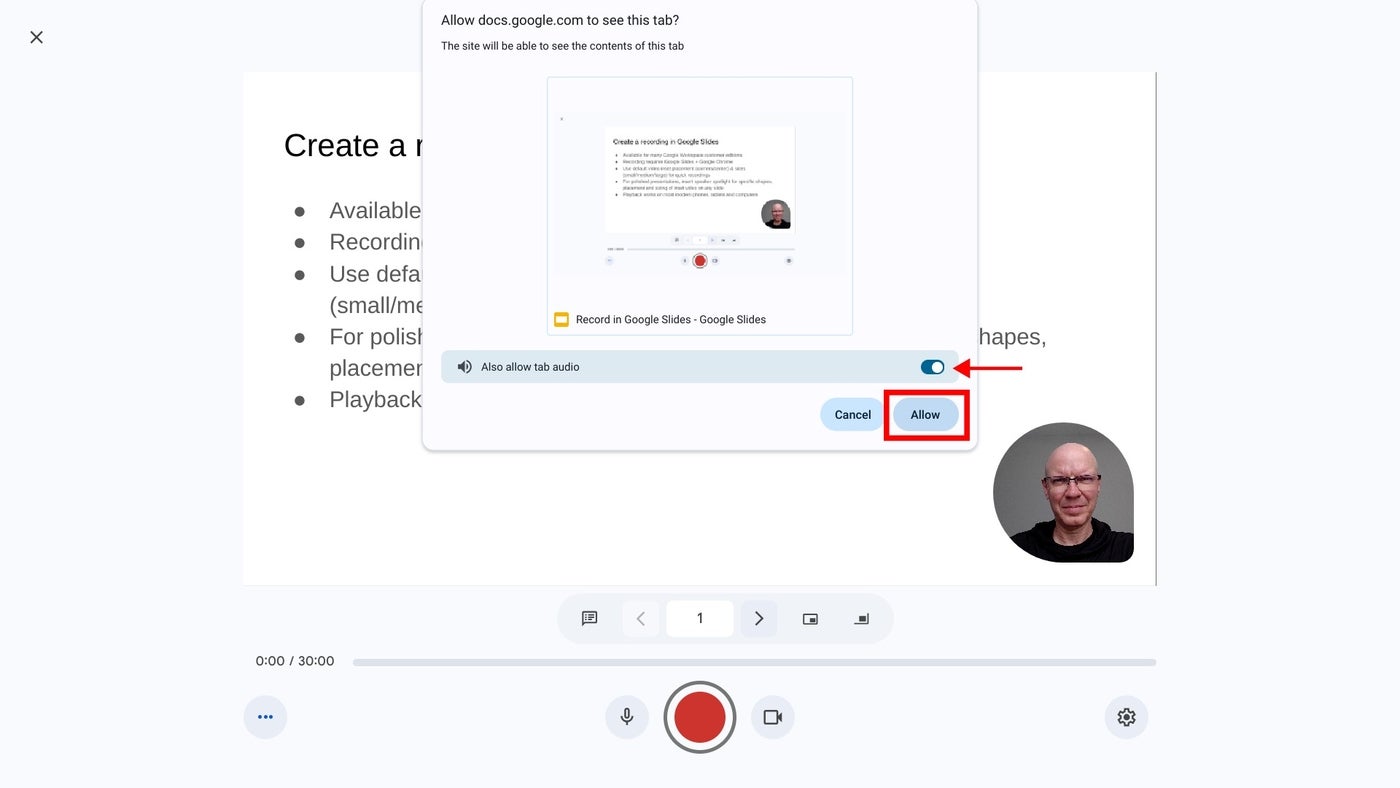
- When you are ready to record, select the large red button at the bottom of the screen.
- If prompted, you may need to allow access (Figure C) to the tab, along with the camera and microphone. For example, when recording on a Chromebook, you may be prompted to “Allow docs.google.com to see this tab?” and “Also allow tab audio.” Select Allow, if prompted.
In a few cases, you may need to visit the following links in Chrome to adjust permissions for:
-
-
- Camera: chrome://settings/content/camera.
- Microphone: chrome://settings/content/microphone.
-
- A brief countdown should display (i.e., 3, 2, 1), then your recording will begin. Record your video, advancing your slides as desired.
| Note: While annotation isn’t available during this kind of recording, you can make it so that your cursor displays. Just toggle the cursor icon to the left of the record button in Figure A before you begin! |
- To pause recording, press the large red button at the bottom of the screen.
- Once paused, you may select from two options (Figure D):
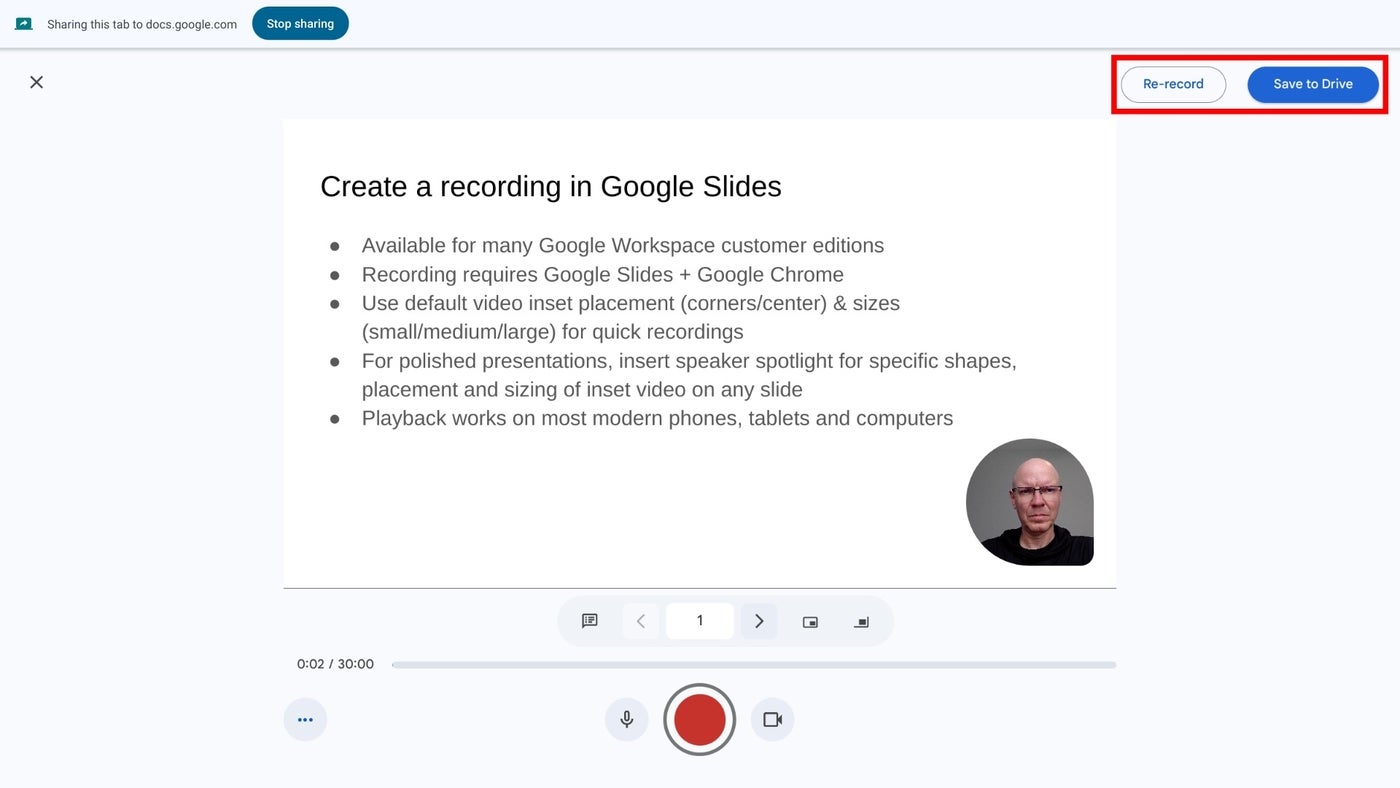
After you select Save to Drive, wait a bit until the system indicates the file has been saved. If you leave or close the tab too soon, you may lose your recording.
How to select inset video shapes and sizes
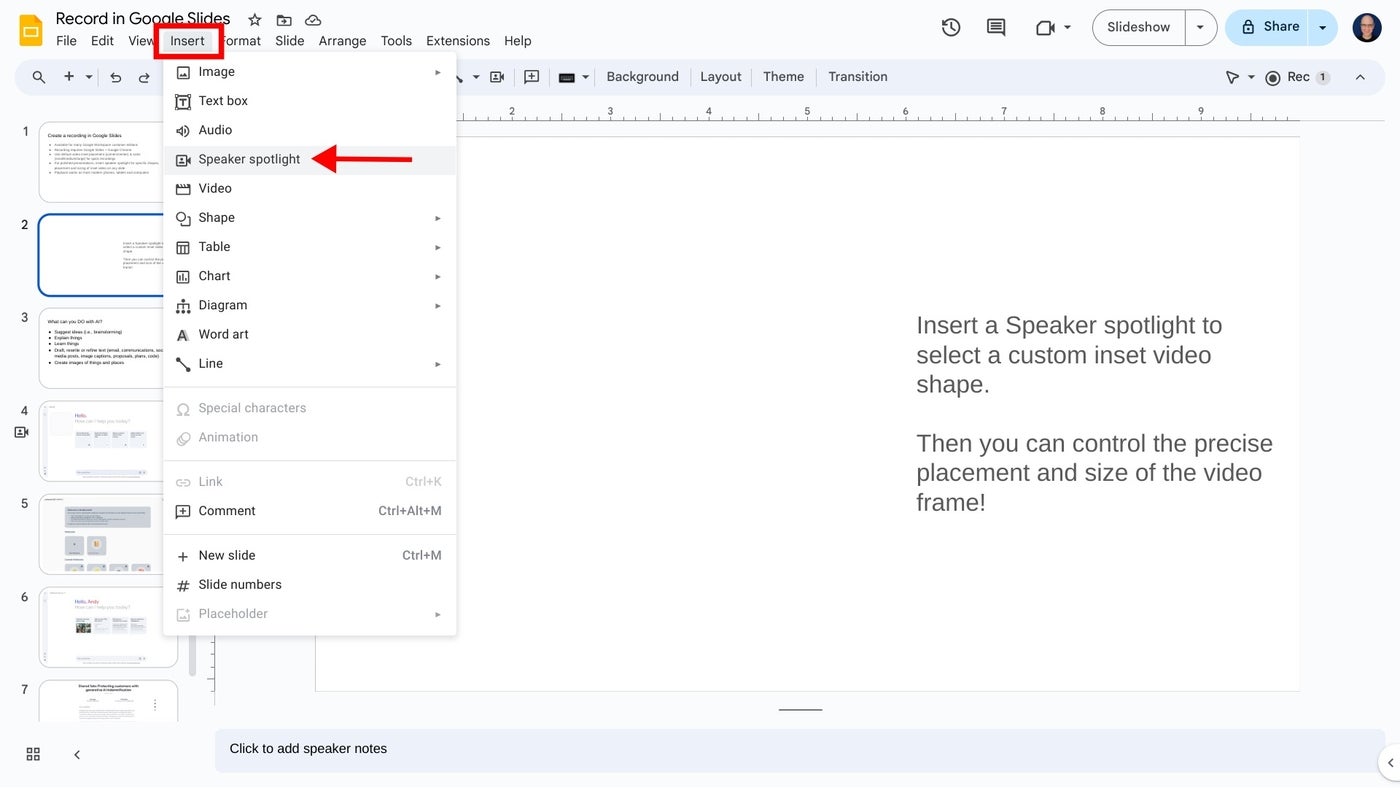
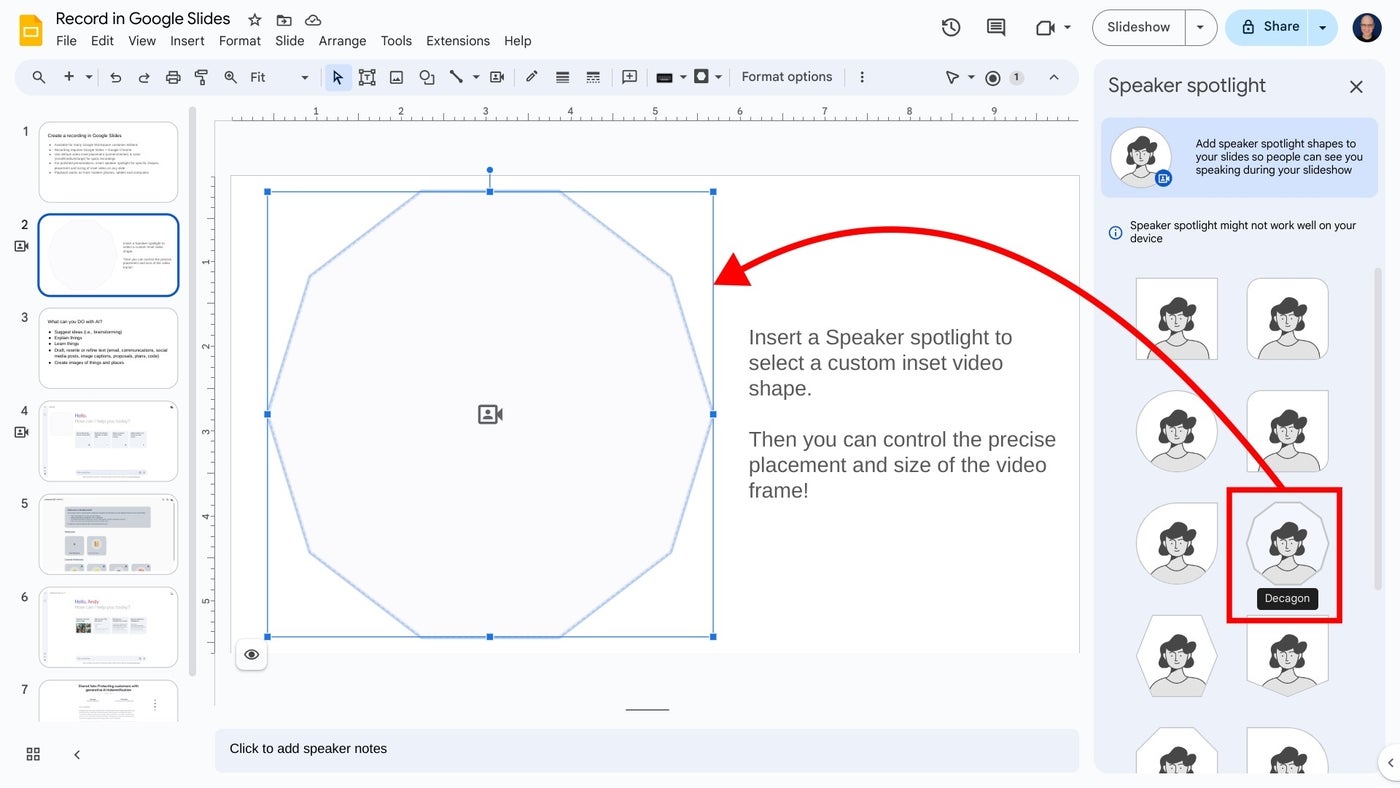
On any slide, you may use the Insert | Speaker spotlight option (Figure E), then select a shaped video frame. This inserts a frame where the speaker video will display on that slide. You may reposition or resize the frame: Select the shape, and then drag-and-drop it to move it to a different place on your slide, or select a corner and drag it to resize it.
When you insert a speaker spotlight shape, that supplants the position and size you might have selected on a basic recording. In other words, the speaker’s video will display in one of the corners or the center, and in the small, medium or large shape chosen with the settings — unless you’ve inserted a speaker spotlight shape on a page (Figure F). Use the speaker spotlight option to convey the most polished professional effect, since it allows precise control over the shape, size and location of a video frame.
How to play, share and manage slide recordings
You may access slide recordings within Google Slides on a computer. However, unlike recording, which requires you to use Google Chrome, you may access and play existing recordings within Google Slides on a variety of modern browsers. For example, the following steps all work when you use Google Slides within either Google Chrome or Apple’s Safari browser.
To access recordings associated with a Google Slides presentation, follow these steps.
- Go to Google Slides and open your presentation.
- Select the Rec button in the upper right area. The recordings you’ve made of the presentations will display. Importantly, the system shows both the date and duration of each recording.
- To view, share or download a recording, click anywhere on the playback icon or title of the recording (Figure G). It should open in a new tab. Within this tab, you might:
-
- Select the Play icon in the center of the video image to play the recording.
- Select the Share button in the upper right corner of the screen to modify access settings and give other people access to the file.
- Select the Download icon in the down arrow above a tray icon in the upper right area of the screen to download the file.

- Select the three dot menu to the right of a listed recording to:
-
- Rename a file something other than the default recording title.
- Remove a previously made recording you no longer need.
- Copy link and obtain the Google Drive URL for the recorded file.
All Google Slides recordings are stored in a Slides recordings folder on Google Drive. The recordings are saved as .webm files, which is a widely supported web video format. You may easily open and play .webm files on both Apple and Android mobile phones. Any recordings you make using Google Slides should be easy to view on almost any device.
Does the ability to record a presentation within Google Slides streamline your workflow? What sorts of video presentations will you create with this new capability? Mention or message me on X (@awolber) to let me know how you use screen recording within Google Slides.
[ad_2]
Source Credit