[ad_1]
Adding a second display to a Mac is typically a straightforward task. Just physically connect an external monitor to an available compatible port on your Mac. Depending upon the Mac you’re using, port choices may include Thunderbolt/USB 4 (providing support for USB-C and DisplayPort, among other technologies) and HDMI. To assist in connecting a second display, many users employ a dock or cables.
Once a compatible external monitor is connected, the Mac will automatically detect, recognize and enable the second display. But the default macOS settings and configuration may require tweaking options for arrangement, resolution, refresh rate and more.
Confirm your Mac’s external display capabilities
If you experience trouble connecting multiple displays to your Mac — most models support connecting at least one external monitor — confirm the number of external displays your Mac is capable of powering.
SEE: Explore our macOS Sonoma cheat sheet.
For example, an M2-equipped Mac mini can drive up to two displays, with one display featuring up to a 6K resolution at a 60Hz refresh rate using a Thunderbolt cable and a second monitor running up to a 5K resolution at 60Hz using either a Thunderbolt or HDMI connection.
More information regarding specific macOS versions and compatible corresponding monitors, cables and adapters is available on Apple’s website.
Adjust display arrangement
Your Mac may set up the new display as if the second monitor sits to the right of your Mac, meaning you need to move the mouse to the right on your Mac’s integrated display to reach the second display. But if the external monitor is located to the left of your Mac, that configuration won’t work well.
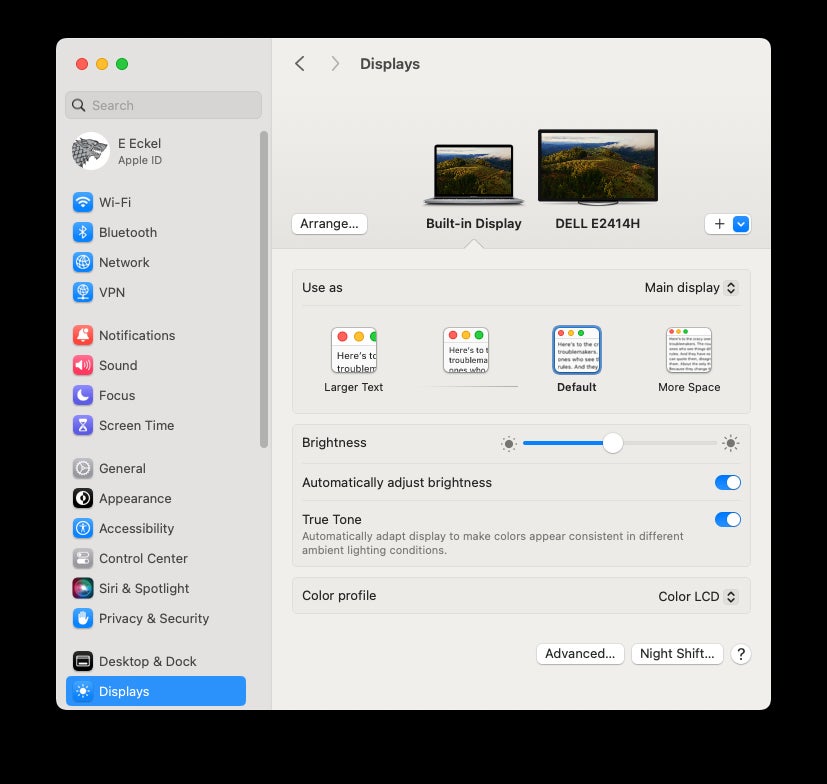
To adjust this, open System Settings by clicking the Apple icon from the Mac’s menu bar and select Displays. The macOS Displays screen will open (Figure A).
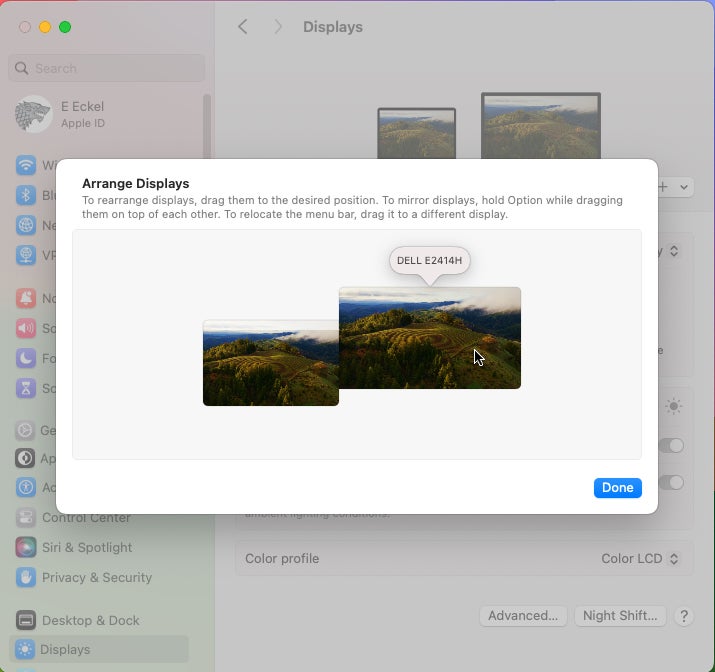
Next, click the Arrange button. Using the Arrange Displays screen, you can physically click and drag the display you wish to adjust to its proper location (Figure B). In addition to moving the displays right and left, you can update the monitors’ location by moving the displays up and down. While a little experimentation may be in order, the feature permits arranging displays in a way that permits intuitively moving the mouse between those monitors.
Adjust resolution and text size
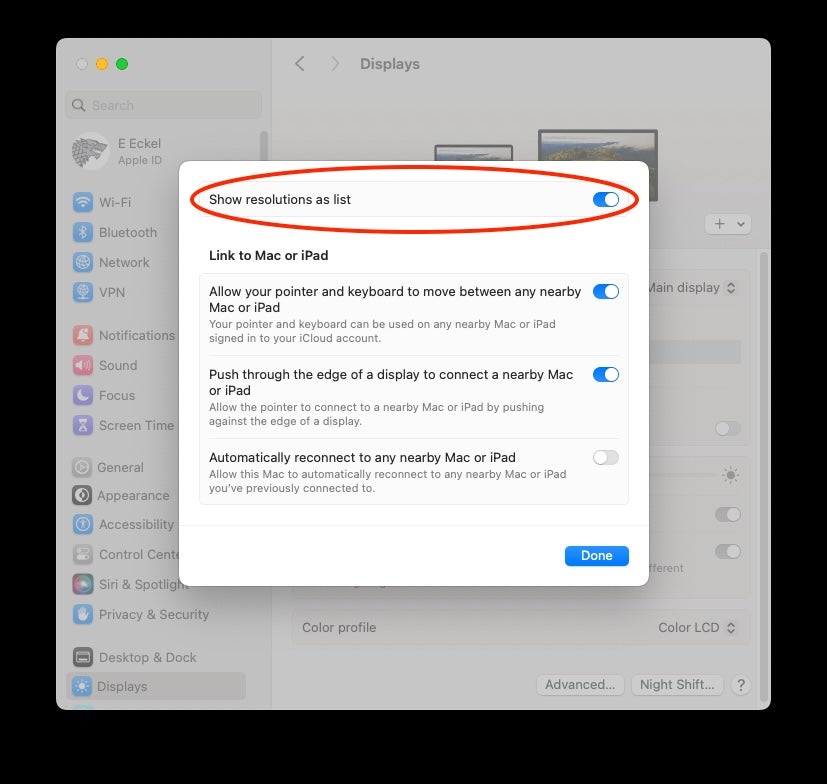
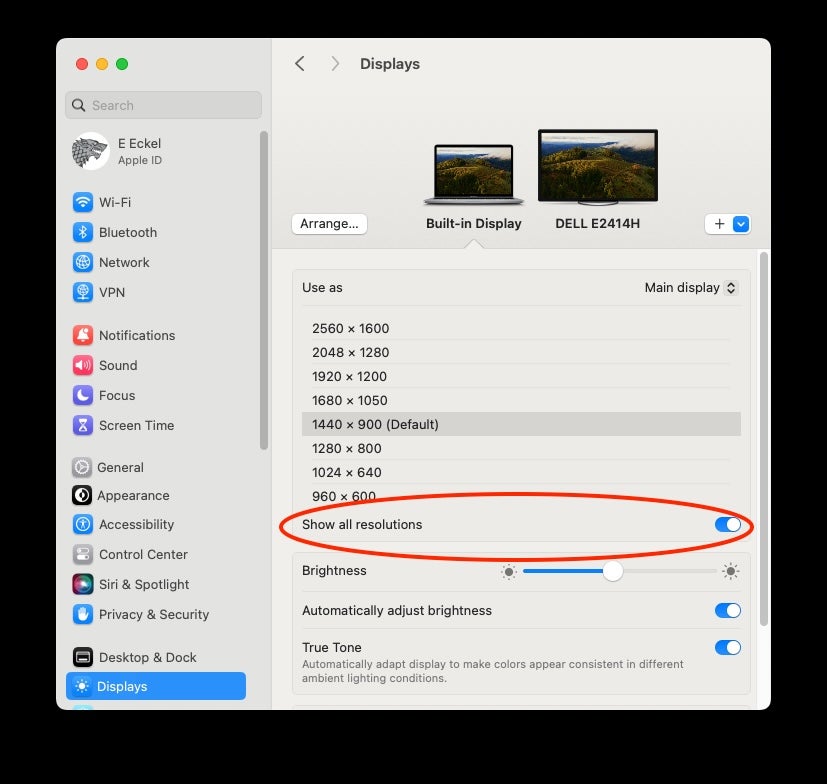
Using the macOS Displays screen, you can adjust your connected displays’ text size. Simply highlight the respective monitor, then the preview image macOS presents. Default options range from Larger Text to More Space, as previously demonstrated in Figure A. However, you can also click the Advanced button at the bottom of the menu and enable the Show Resolutions As A List option (Figure C).
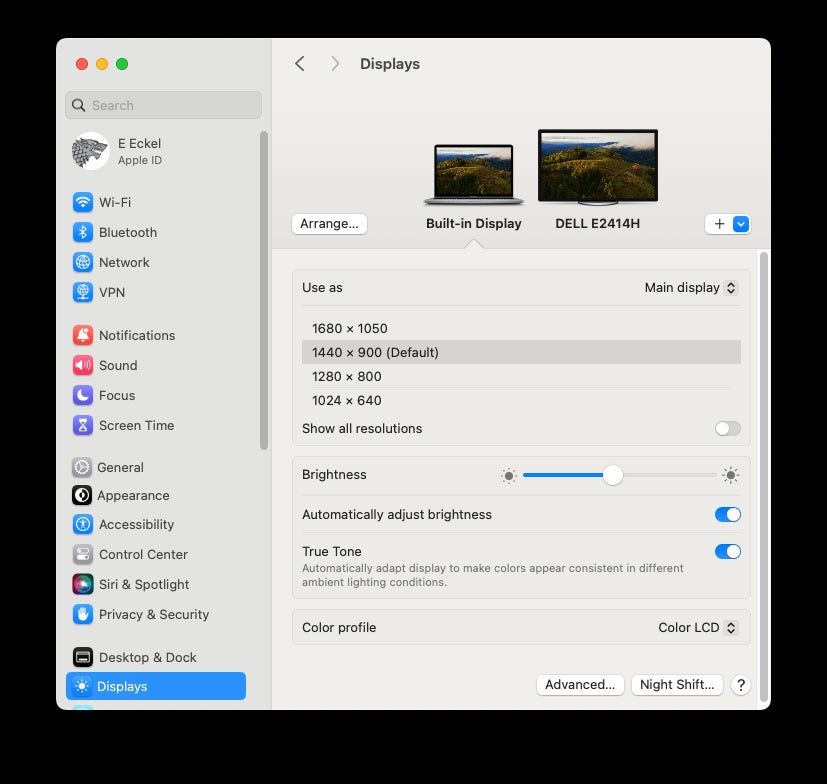
macOS will then present supported resolution options within the Displays screen (Figure D).
You can explore further options by enabling the Show All Resolutions radio button (Figure E). Again, some experimentation may be required to settle on the display option that works best for your needs for each display you’re using.
Change the display function
The Displays menu permits adjusting how a second display works. For example, you can click the Use As dropdown menu and, instead of using the default Extended Display option for the second monitor, choose:
- Mirror For Built-In Display to mirror your Mac’s integrated display to the second monitor.
- Main Display to make the second monitor your primary.
Adjust the display color profile
Another display configuration option is color profiles. Selection choices frequently include:
- Color LCD.
- Proprietary profiles specific to the Mac’s manufacturer’s display.
- Generic RGB Profile.
The setting permits adjusting the colors MacOS displays to aid professionals working with specific graphic, image and video color-matching needs.
Change the refresh rate
Refresh rates are yet another configuration setting that can be changed. Users viewing and editing videos, for example, may wish to specify a higher refresh rate. Higher refresh rates force the display — including an external monitor you’ve connected to your Mac — to update more frequently. The result is smoother video presentation and, subsequently, less blurring.
Adjust display orientation
Should you need to position a monitor vertically — such as when editing manuscripts using a portrait screen orientation instead of a horizontal perspective, for example — you can select the 90-degree option from the display rotation dropdown menu. The option will change the display’s configuration to update and properly match the external monitor’s display orientation.
Enable Night Shift
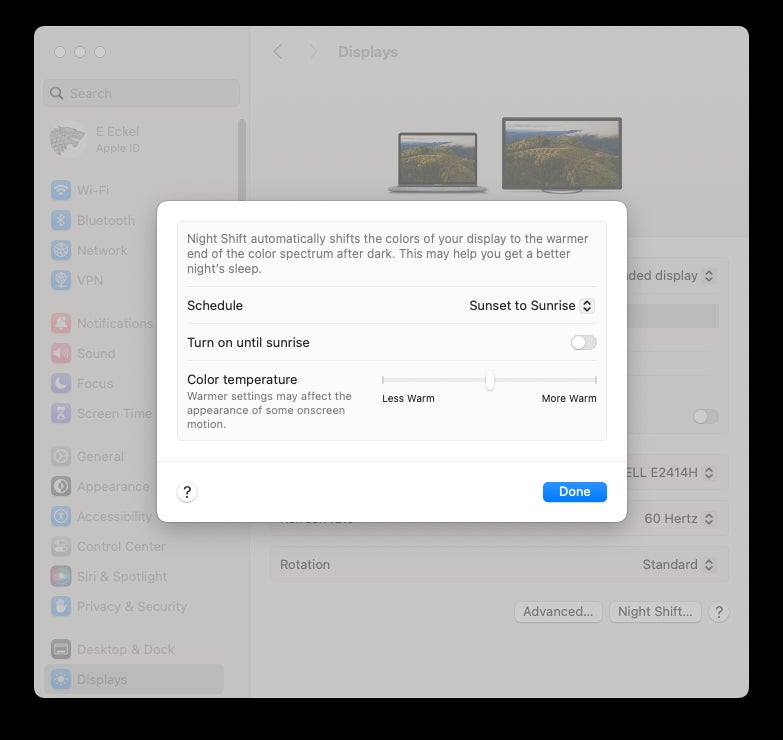
Reducing blue light, especially at night, is commonly attributed to decreasing eye strain and improving sleep. Apple’s Night Shift aims to do just that. A corresponding button appears on the bottom right of the Displays menu. To enable the Night Shift feature, which automatically ensures the monitor adjusts to using warmer spectrum colors and less blue light later in the day, change the Schedule value to either a custom setting you specify or the Sunset To Sunrise preset (Figure F).
Tips to remember when adding a second Mac display
Adding an external display significantly enhances a Mac’s operation. Taking a few moments to ensure you’ve configured the second monitor as you need helps ensure you optimize the second display’s potential.
Whenever adjusting an external display’s options, be sure to first select that monitor within the System Settings Display menu and then proceed to making your adjustments. Otherwise, you could accidentally adjust the settings on the incorrect display — in which case, you can always switch them back to the previous configuration.
If you’re further interested in working with a second display, you can read up on alternative options for connected external displays, including using Duet Display. Alternatively, you can explore using an iPad to help extend your macOS Desktop using Apple’s Sidecar technology.
[ad_2]
Source Credit