How to Use Finder to Search the Current Folder on Your Mac

[ad_1]
Searching in the Finder is the first step to, well, find things on your Mac. Learn the ins and outs of searching for files on your Mac in this article.
When you search for a file on a Mac using Spotlight, Finder or another window with a search field, the default search range is This Mac. Using the This Mac option means the search is performed on the internal hard drive and all connected drives, such as external hard drives, USB thumb drives and even network-connected drives.
While handy, if you’re searching for a fairly unique text string and have no idea where the file could be, the results from such a broad search can be overwhelming or difficult to sort through, especially when searching for a common term or a string of characters used in a system file. Luckily, you can easily change the default search location for Apple macOS Finder.
Jump to:
How to search the current folder or drive with macOS Finder
If you know the file’s general location, such as the drive on which it’s stored or the folder where it’s located, searching only that location will dramatically narrow the results and help you find the file more quickly.
To change the default search location:
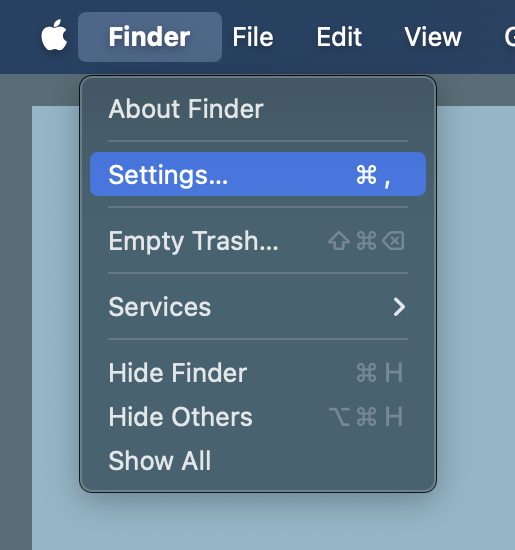
- Open Finder Settings by clicking anywhere on the desktop, clicking Finder on the menu bar and then choosing Settings (Figure A). You can also use the Mac keyboard shortcut, Command + , in a Finder window.
Figure A
- Select Advanced in the Finder Settings window to change the default search location (Figure B).
Figure B
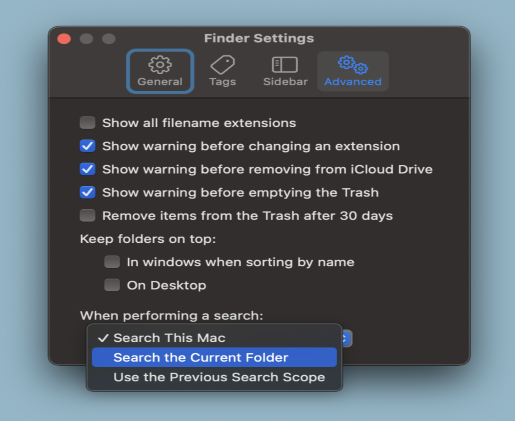
- Under When Performing A Search, select Search The Current Folder.
- Close the Finder Settings window.
Now, when you perform a search in a Finder window, instead of searching everywhere on your Mac for the file, the Finder or other windows will search within the currently selected folder. This is a great improvement when you know what folder the file is in but don’t know exactly what the file is called (Figure C). You can always click on the This Mac button to begin searching the Mac again.
Figure C

How to narrow macOS Finder search results
If you need to further refine your the search results in a Finder window, you can use also the following tricks:
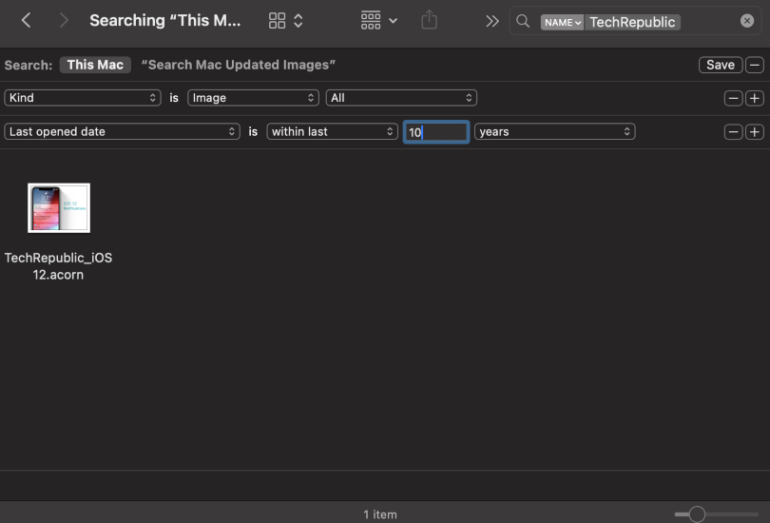
- Add criteria to your search, such as Kind, Last Opened Date and Name, on the search result Finder window (Figure D).
Figure D
- Include keywords in the original search string — for example: macOS tips kind:document (Figure E).
Figure E

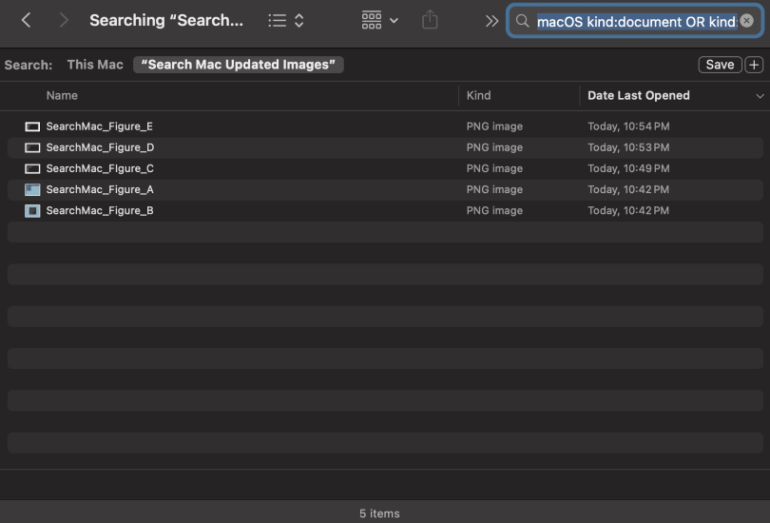
- Use a Boolean operator as part of your query, such as AND, OR and NOT or a minus sign (-) for AND NOT — for example: macOS tips kind:document OR kind:image (Figure F).
Figure F
More macOS Tips
While this article focused on the Finder in macOS, you might also have other questions such as:
Apple also announced a lot of new tech, such as macOS Sonoma, iPadOS 17 and iOS 17 at this year’s Worldwide Developers Conference earlier this year. Check out TechRepublic’s cheat sheets to stay on top of the latest in Apple’s ecosystem.
[ad_2]
Source Credit


